Pages

Monday, March 28, 2011

Sleeved pink dress with a ruffle

The lack of dresses for girls with sleves was part of the reason I became interested in sewing again.  The daycare centre has a very sensible sun-safe policy (which I completely agree with) which prohibits sleeveless shirts and dresses.  The problem is, many sundresses for little girls are strappy little things with no sleeves.

Anyway, I figured I'd start with something simple, so I selected this New Look pattern 6960.

I decided to view A/B, but without the embellishments
I knew it had a zip in it (one challenge) but what I didn't realise is that it also used bias binding to finish off the armhole seams.  I have never really used bias binding before, so that was a new experience. It certainly gives a neat finish to the seam, probably not a bad thing around the armholes. 

armhole detail - can you see how it is finished off?
The zip actually turned out great.  Probably the best zipper I have ever done.  Mind you, I have done some shockers in my time, so that's not necessarily saying too much.  :)  But this one turned out great and you can't even tell it's there - which is why I haven't included a photo.  It's really a nothing photo of the zipper.  :)

When it came to doing the hem, I decided at the last minute to add a ruffle.  So I cut 2 inches off the bottom and cut a few strips of left-over fabric for the ruffle.  I had bought a ruffle foot for my machine a couple of months ago, but this is the first time I have ever used it.  It's a wonderful piecing of engineering!  I love it.  It's very easy to use and make a great pleat.  It took me a while to figure out what ruffle setting to use and what stitch length but once I had that sorted, I was off like a rocket.  Again, I used bias binding to finish off the hem seam, just to make it neater.


the ruffle!


a close-up of the ruffle.  You can see how the seam was finished off as well.
 Anyway, here's the finished dress.  I will try to get a pic of Samantha in it tomorrow.  I made this so that she could wear it to daycare.  :)  She is excited to have a new dress for daycare, and it has a ruffle!!!

Tuesday, March 22, 2011

Feeling groovy ....

I have bought some fabric for Samantha's quilt.  At this stage I have no idea of the design, but I thought the Feeling Groovy range from Riley Blake was just great for Samantha.


Samantha loves the fabrics.  I bought a yard of most of the fabrics (there were a few brown/green ones I didn't get).

Now to think of a good quilt design that I can actually pull off - something bright and funky, and good for a 4 year old .... any ideas??  :)

Super Easy Chicken Roll

A friend at work shared this with me and I had to try it.  And she was right - it's super easy to do, looks a little bit fancy and was a huge hit with the kids.

What do you need?
- 100g proscuitto (or however you spell it)
- 2 skinless chicken breasts
- smooth ricotta (3-4 spoons)
- semi-dried tomatoes, probably about 1/4 cup
- fresh basil if you have it, finely chopped.  (could probably substitute dried basil)
- salt and pepper to taste
- cooking twine

What do you do?
Pre-heat oven to about 170 degrees.  Lengthways, cut each chicken breast so they are roughly the same thickness.  Belt the chicken with a mallet or similar (I used a very heavy rolling pin) until the meat is reasonably thinner than it was.  In a small bowl, mix the ricotta, tomatoes, basil, salt and pepper.

Now, you need to put it all together.  Lay out a piece of baking paper (non-stick is best but use whatever you've got).  Arrange the proscuitto in one layer, slightly overlapping as you go.  Then, over the top of the proscuitto, arrange the flattened chicken in the opposite direction (ie. if you laid the proscuitto in a north-south direction in front of you, try to arrange the chicken in a east-west direction).  You do this so that the chicken roll is a bit more stable when completed.  Then spread the ricotta-tomato mixture all over the chicken.

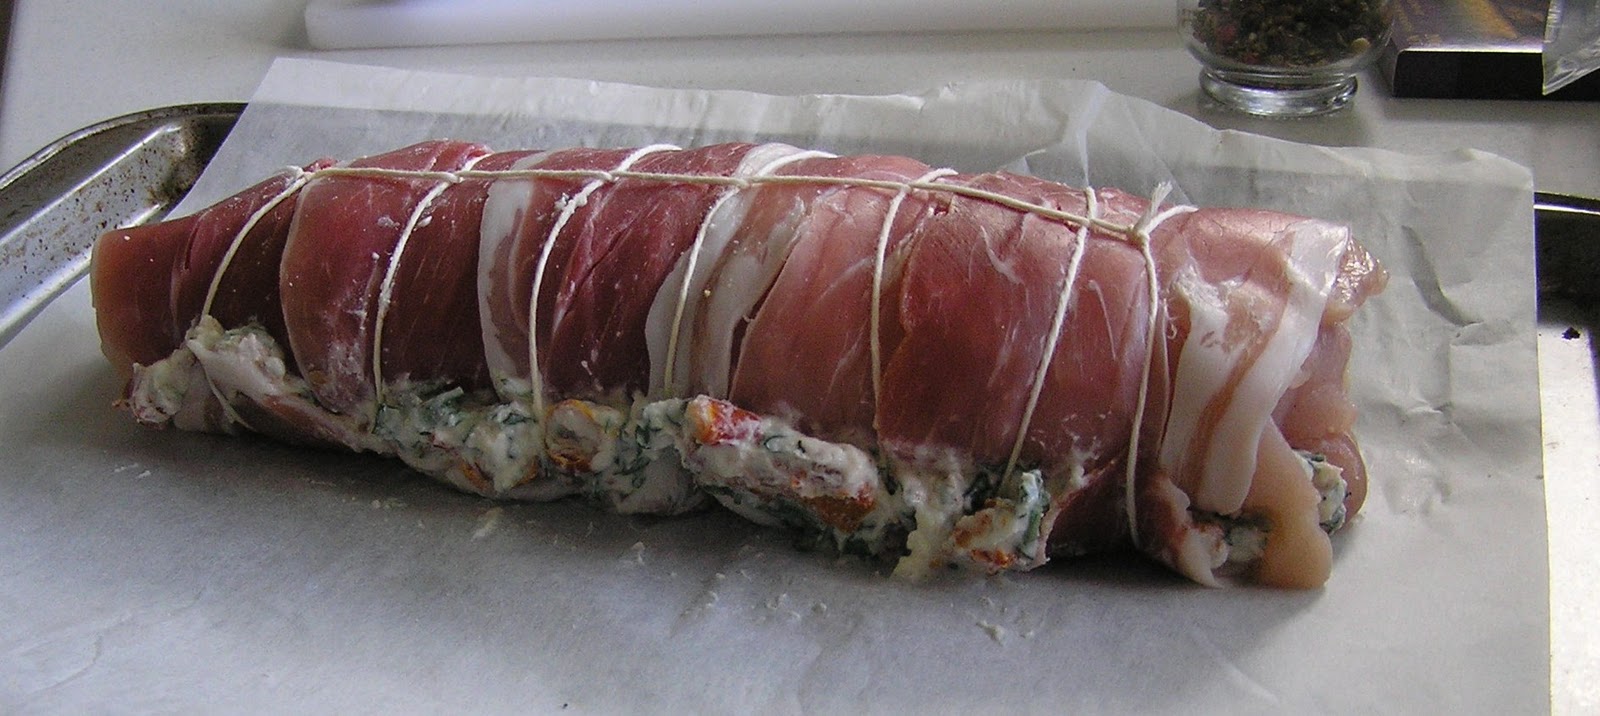
Now you are ready to start rolling it up.  Position the proscuitto-chicken in front of you so that it runs lengthways away from you.  Using the baking paper to help you, begin rolling the chicken onto itself.  It will probably only make one roll.  The hardest bit (or so I thought) was tying up the chicken roll so that it won't fall apart while cooking.  Start at the top end and wrap the twine around the top, tying it off with a knot (I think I used a granny knot or a reef knot - who cares, as long as it holds).  Then keep looping it around so you go down the chicken roll.  It does get a little bit messy but it's not too bad.  You do need a bit of twine for this, I suggest at least 3 times the length of the chicken roll.  When you have finished, it will look something like this ...


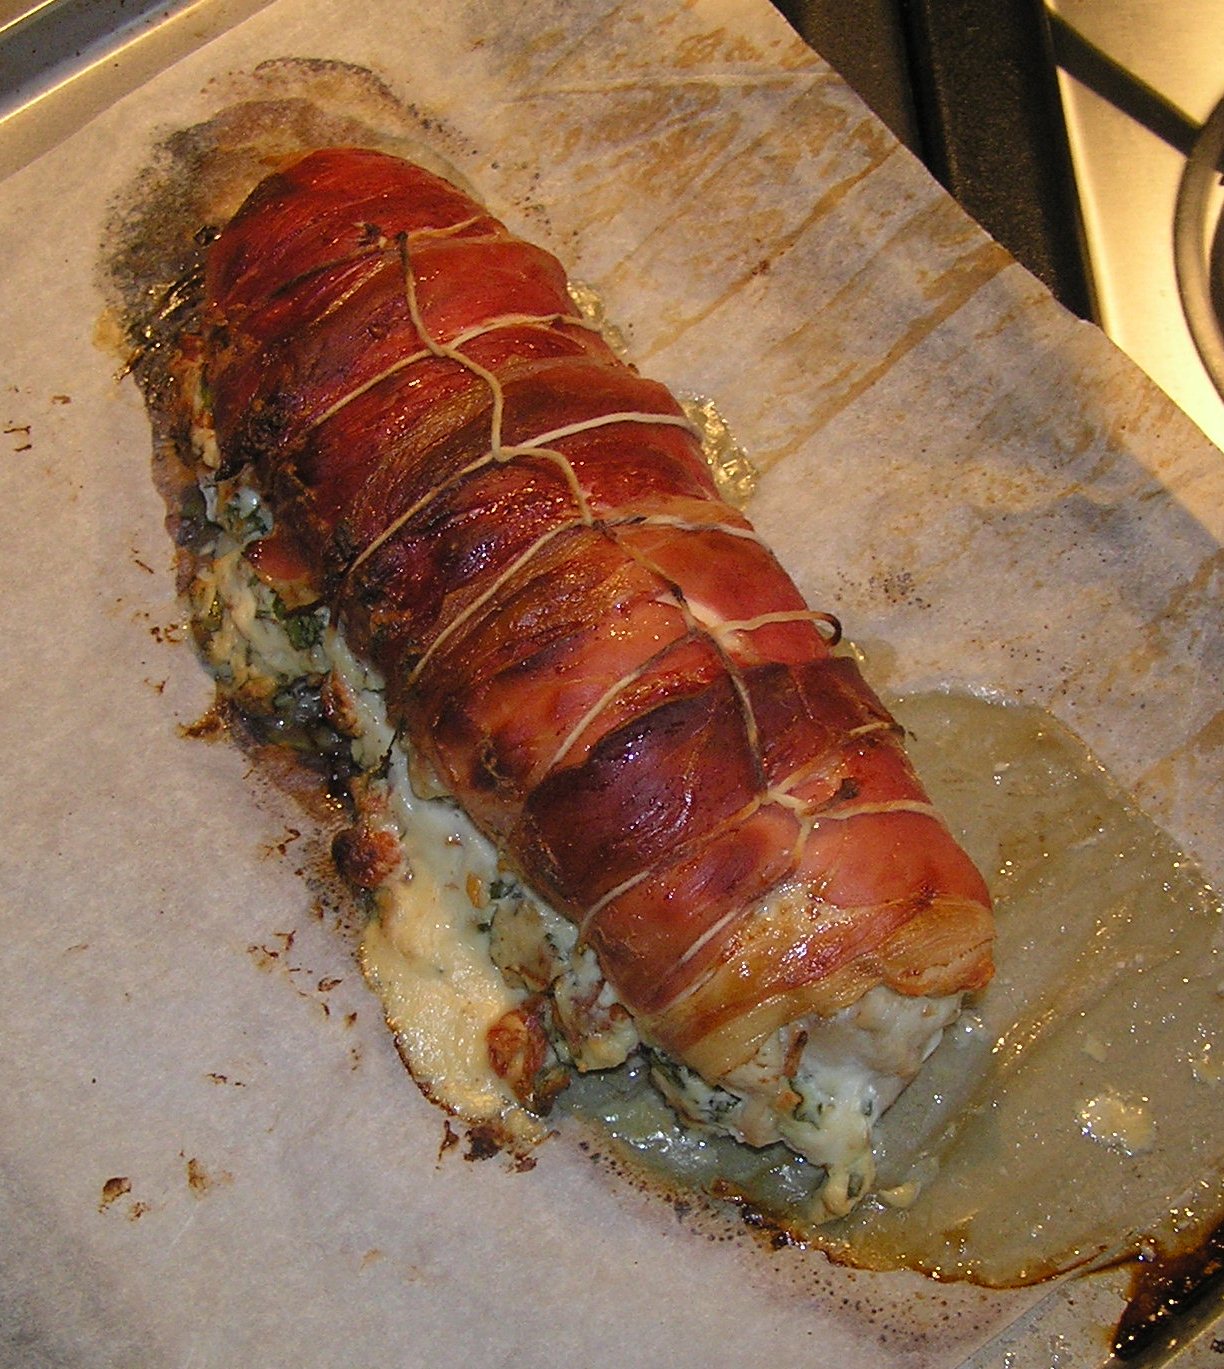
Pop it in the oven for roughly 45-50 minutes.  Let it rest for about 5-10 minutes before you slice it up. It comes out looking like this -


If you want to make it a more flavoursome, use regular bacon instead of proscuitto.  It'll be a lot fattier though.  The preparation of the chicken roll probably took me about 10-15 minutes and using the cooking twine was much easier than I expected.

I made this over the weekend and it was a huge hit with the whole family.  I have already been asked when can we have it again.  :)

Monday, March 21, 2011

Birthday Hat for William

One of Samantha's little friends, William, is having a birthday soon and I thought I would make a hat for him.  Don't ask me why, I have no idea what got into me. :)  Must have been full moon or something.

Anyway, I decided to use the Lazy Day Hat from Make It Perfect, my first "indie" pattern.  It's a reversible bucket hat and comes in 4 sizes (small, medium, large and extra-large).  Samantha picked out the fabric for the hat, although I had to convince her that William would probably prefer a colour other than pink (her firm favourite).  The fabric came from Spotlight's quilting cotton range (I don't know the details).

I cut out the fabric and interfacing one  night and sewed it the next night.  The sewing probably took me about 2 hours I reckon, in between chatting to hubby and watching bits and pieces of TV.

Anyway, this is what I finished up with ...

The "outside"

The "inside"
I'm pretty happy with it.  Samantha thinks it fits fine and now she wants one, in pink of course!  What do you think?

Saturday, March 19, 2011

Woo hoo, potholders are finished!!

Finished the potholders and have finally found some time to take pics and post on the blog.  The potholders will be sent off for the swap next week (thanks for your patience Bec!).

And here they are ....

Drunkards Path.  From a piercing point-of-view, this was the most complicated.  I think it turned out well and I like the colours in this.

Pinwheels.

Strippy.  Bright and cheerful!  :)

Log Cabin.  I love the colours in this one.  Tried to get a bit more arty with this quilting, but I don't think I pulled it off very well.

Card Trick.  The quilting on this came out better than I expected and looks great on the back.

Now that these are finished, I have a pile of other sewing I want to do ....
- bucket hat for a friend's child (birthday present)
- finish dress for Samantha
- ruffle skirts for Samantha and Asha
- ladybug dress for Asha
- pinafore dresses for Samantha and Asha
- quilt for Gran (think I have a plan for this one ...)
- quilt for Samantha (have bought the fabric, have no idea what design I am going to do!)
Yep, it's a long list, I'd better get cracking .... particularly if the girls want to wear those dresses and skirts this winter!  :)